We use cookies to improve your experience, analyze traffic, and display personalized ads.
By clicking "Accept", you consent to the use of cookies in accordance with our Privacy Policy.
How to Grow Garlic in New Zealand: The Ultimate Guide for a Massive Harvest
There is something incredibly satisfying about pulling up your own plump, pungent garlic bulbs after months of growing. If you are wondering how to grow garlic at home, you are in the right place. Garlic is one of the easiest, most rewarding, and lowest-maintenance crops you can cultivate in a New Zealand garden. Because it takes up very little horizontal space, it is perfect for both expansive raised beds and compact urban containers.
Packed with robust flavour and incredible medicinal properties, homegrown garlic completely outshines the bland, imported supermarket varieties. While it requires a long growing season of around seven to eight months, the actual hands-on work is minimal. If you set up your soil correctly and get your timing right, this is a true “plant and forget” crop that will reward you with a pantry full of superfood by mid-summer.
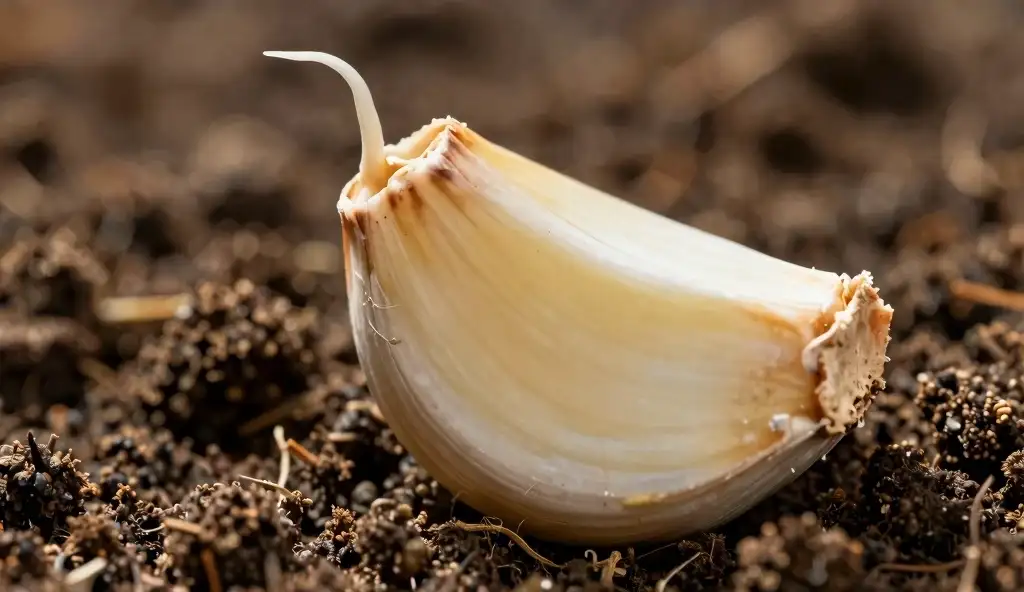
Unlike most vegetables, garlic is not grown from traditional seeds. Instead, it is grown vegetatively by breaking apart a mature bulb and planting the individual cloves. Each single clove will sprout, grow a tall stalk of leaves, and eventually multiply underground to form a brand new, multi-clove bulb.
Before you start digging, it is important to understand the two main categories of garlic, as your New Zealand climate dictates which will perform best in your backyard.
Hardneck vs. Softneck Garlic
Hardneck Garlic: Known for its complex, intense flavour, hardneck garlic produces a rigid central stalk and a distinctive flowering stem called a “scape.” The bulbs usually have fewer, but much larger, cloves. Hardnecks require a period of cold weather (vernalisation) to form bulbs properly, making them the perfect choice for the frosty winters of the South Island and lower North Island.
Softneck Garlic: Softneck varieties (like the popular Printanor) have a flexible stem that is perfect for plaiting into garlic braids. They produce more cloves per bulb, usually in overlapping layers, and boast a longer shelf life. Because they do not require a deep winter freeze to trigger bulb formation, softnecks are the go-to choice for warmer, subtropical regions like Northland and Auckland.
Ideal Growing Conditions for Garlic
Setting up the right environment is the secret to avoiding tiny, underwhelming bulbs. Garlic is a surprisingly hungry and demanding plant when it comes to its root zone.
Sunlight Requirements
Garlic thrives in full sun. Choose a location in your garden that receives a bare minimum of six hours of direct sunlight daily. The more sun the leaves can soak up during the spring growth phase, the more energy the plant can send down to swell the underground bulb.
Soil Preparation and pH
The better your soil, the bigger your harvest. Garlic needs loose, freely draining soil to prevent the cloves from rotting over the wet winter months. It prefers a slightly acidic soil pH of between 5.5 and 7.0. If you are dealing with heavy clay, you must improve the drainage by heavily amending the area with organic matter. Dig in generous amounts of mature compost and sheep pellets weeks before planting. If you are filling a new raised bed, a high-quality bagged vegetable mix provides the perfect loamy texture.
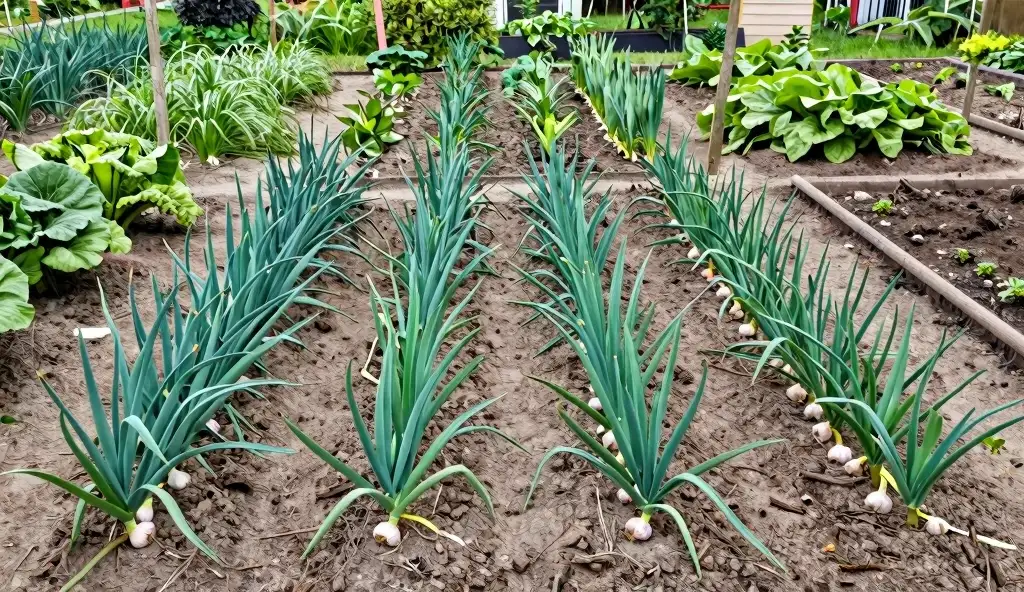
Spacing and Airflow
Garlic suffers heavily from fungal diseases if planted too densely. Aim for a spacing of 10 to 15cm between individual cloves, and leave roughly 30cm between rows. This spacing allows the wind to dry the leaves quickly after rain, dramatically reducing the risk of rust.
When to Plant Garlic in New Zealand
Timing is everything when learning how to grow garlic. The plant needs a long period of cool vegetative growth followed by the longer, warmer days of late spring to trigger the bulbing process.
The Traditional Rule vs. Modern Climates
The age-old Kiwi gardening tradition is to plant garlic on the shortest day of the year (the Winter Solstice, around June 21st) and harvest on the longest day of the year (the Summer Solstice, around December 21st). While this is a wonderful rule of thumb, modern climate realities mean it is not always the best approach for every region.
Climate Zones Breakdown
Warm Regions (Northland, Auckland, Waikato): Plant earlier, between April and May. Getting an early start allows the garlic to do the bulk of its growing before the warm, humid spring weather arrives, which often triggers devastating garlic rust.
Temperate Regions (Wellington, Nelson, Canterbury): Stick to the traditional May to late June window. The soil is cool enough to encourage root development without the cloves rotting.
Cool Regions (Otago, Southland): June is ideal. The severe frosts will not harm the cloves planted safely beneath the soil; in fact, the freezing temperatures will help hardneck varieties split into distinct cloves.
How to Grow Garlic: Step-by-Step Planting Guide
Follow these exact steps to ensure your crop gets off to a flawless start.
Step 1: Source Quality Seed Garlic
Never plant garlic bought from the supermarket produce aisle. Supermarket garlic is often imported, treated with chemical sprout inhibitors, and can introduce devastating soil-borne diseases like white rot into your garden. Always purchase certified, disease-free seed garlic from a reputable garden centre or seed merchant.
Step 2: Prepare the Garden Bed or Pot
Clear the area of all weeds. Fork the soil over gently to loosen it, and blend in a base dressing of blood and bone or a dedicated vegetable fertiliser. If you are growing in containers, choose a pot that is at least 30cm wide and 20cm deep, ensuring it has excellent drainage holes. Fill it with premium potting mix.
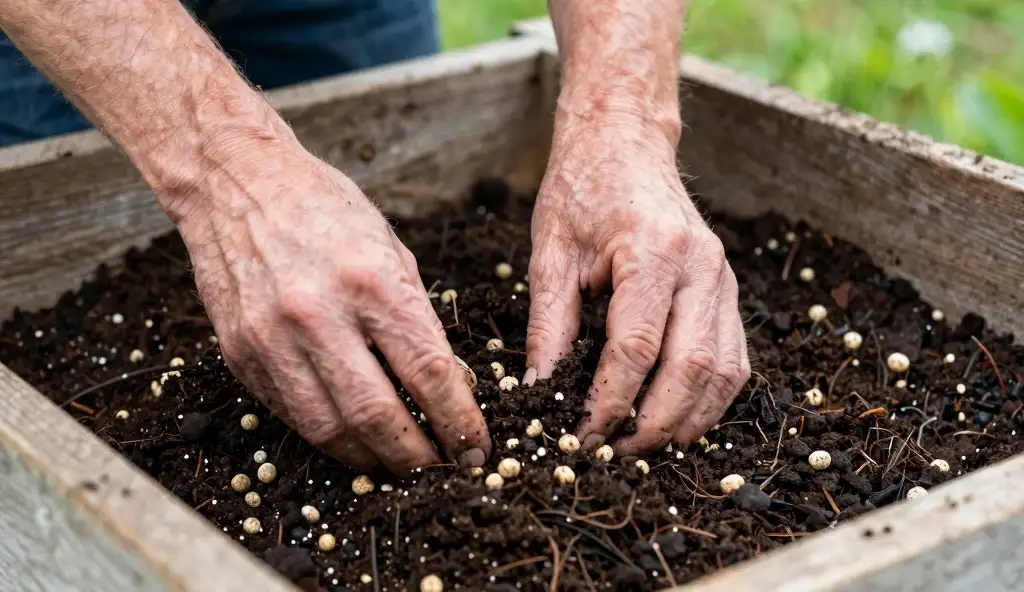
Wait until the exact day you are ready to plant before breaking the main garlic bulb apart into individual cloves. If you crack them too early, the root nodules will begin to dry out. Keep the papery skins on the cloves, as this protects them from soil pests. Select only the largest, plumpest cloves from the outside of the bulb to plant; save the tiny inner cloves for the kitchen.
Step 4: Plant at the Right Depth and Orientation
Using a dibber or a bamboo stake, make holes in the soil. Push each clove into the hole with the flat basal plate (the root end) facing down, and the pointy end facing straight up. Bury the clove so the tip is at least 5cm below the surface of the soil. Shallow planting is a massive beginner mistake. If planted too shallowly, the strong roots will push the clove right out of the soil as they grow, causing the heavy top plant to fall over.
Step 5: Mulch Heavily
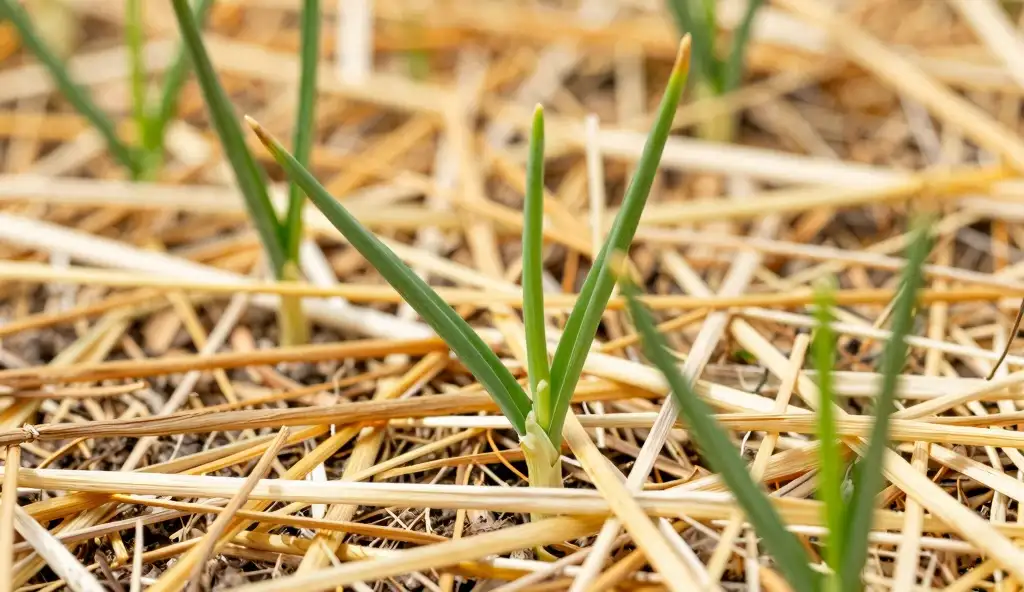
Water the bed thoroughly to settle the soil around the cloves. Apply a 5cm layer of organic mulch, such as pea straw, over the entire bed. Mulch acts as a blanket, regulating soil temperature, suppressing weed growth, and keeping moisture levels consistent over the long growing season.
Watering Needs for Plump Bulbs
Garlic has varying water requirements depending on its growth stage. Over the winter months, natural rainfall is usually sufficient, and you should rarely need to water. The soil should be moist, but never waterlogged, as wet feet will cause the cloves to rot.
As spring arrives and the green leafy shoots surge in growth, increase your watering. Consistent moisture during the spring months is critical for developing large bulbs. However, you must dramatically reduce, and eventually stop, watering about three to four weeks before your late December harvest. Allowing the soil to dry out helps the papery skins cure underground and drastically improves the storage life of your crop.
Fertilising Schedule: Feeding Your Garlic
Garlic is a heavy feeder. Because it occupies the soil for up to eight months, the initial nutrients you dug into the bed will eventually run out. To push the plant to create massive bulbs, you need a structured feeding schedule.
When the first green shoots push through the mulch, begin a liquid feeding routine. Apply a complete, nitrogen-rich liquid fertiliser (like a dedicated veggie and herb food) every two to three weeks. Nitrogen fuels the tall, leafy green growth. The more leaves your plant has, the bigger the resulting bulb will be, as each leaf corresponds to a layer of papery wrapper on the final bulb.
Once spring turns to early summer (around November) and you notice the bulbs beginning to swell at the base, switch from high-nitrogen feeds to a potassium-rich fertiliser, or simply rely on a slow-release side dressing of sheep pellets. Stop feeding entirely one month before harvest.
Garlic Pruning and Maintenance
Garlic has an incredibly shallow root system and thin, vertical leaves that cast almost no shade. This means it is highly vulnerable to weed competition. Weeds will ruthlessly steal water and nutrients from your garlic, resulting in stunted bulbs. Keep your garlic beds meticulously weed-free by hand-pulling weekly.
If you are growing hardneck varieties, the plant will send up a curly flower stalk known as a scape in late spring. You must prune this off. Snip the scape off at the base as soon as you see it curling. If left to bloom, the plant will divert its energy into creating seeds rather than swelling the underground bulb. (Bonus: garlic scapes are a culinary delicacy, perfect for pesto or stir-fries!).
Troubleshooting Common Garlic Problems
Even the hardiest crops face challenges. Here are the most common issues New Zealand gardeners encounter when learning how to grow garlic.
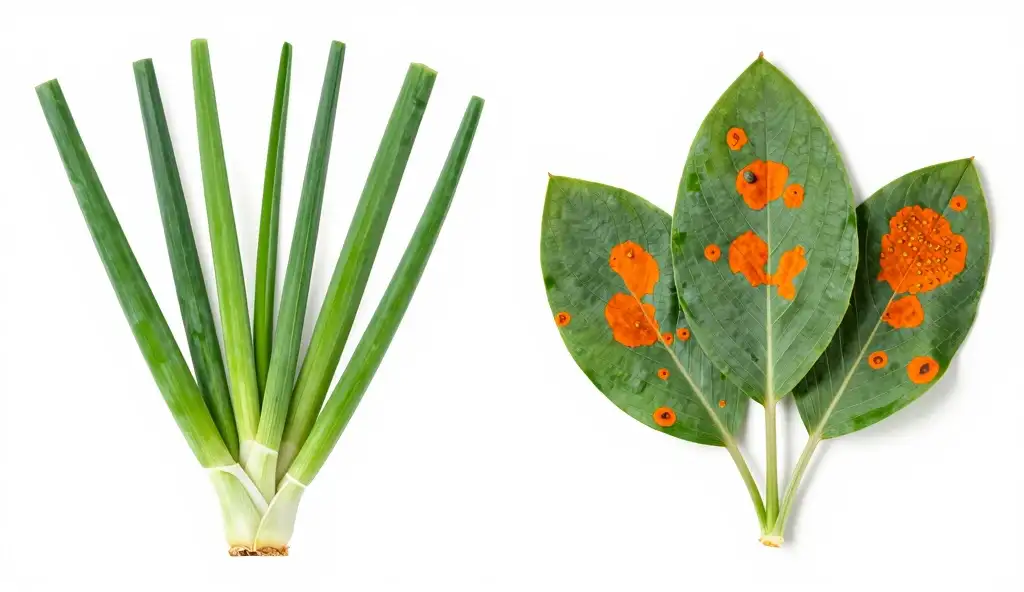
Garlic Rust
Rust is the absolute bane of garlic growers, particularly in humid climates. It manifests as raised, bright orange or rust-coloured pustules on the leaves. As the infection spreads, the leaves yellow and die back, stunting the bulb. To prevent rust, ensure wide plant spacing, avoid watering the foliage (water only the base), and rotate your crops. If rust strikes late in the season, simply trim off the worst affected leaves and harvest as normal—the bulb is usually still perfectly edible.
White Rot
Onion white rot is a devastating soil-borne fungus that causes the leaves to yellow and wilt, while the base of the bulb turns to a fluffy, rotting white mess. There is no cure for white rot, and the fungal spores can survive in the soil for over 15 years. The only prevention is strict crop rotation and buying certified disease-free seed garlic.
Bulbs Not Forming
If you pull up your garlic and find a single, solid round mass instead of separated cloves (known as a “garlic round”), it usually means the plant experienced extreme stress. Common causes include planting too late in the season, inadequate watering during the spring growth spurt, or a lack of cold weather for hardneck varieties.
Harvesting Guide: When and How to Lift Garlic
Knowing exactly when to harvest is crucial. If you harvest too early, the bulbs will be tiny and lack wrapper layers. If you harvest too late, the cloves will begin to split apart in the soil, ruining their shelf life.
The golden rule is to look at the leaves. Do not wait for the entire plant to turn brown. Harvest your garlic when the bottom two or three leaves have turned brown and papery, but the top four to five leaves are still green. Each green leaf represents a protective papery wrapper around the bulb.
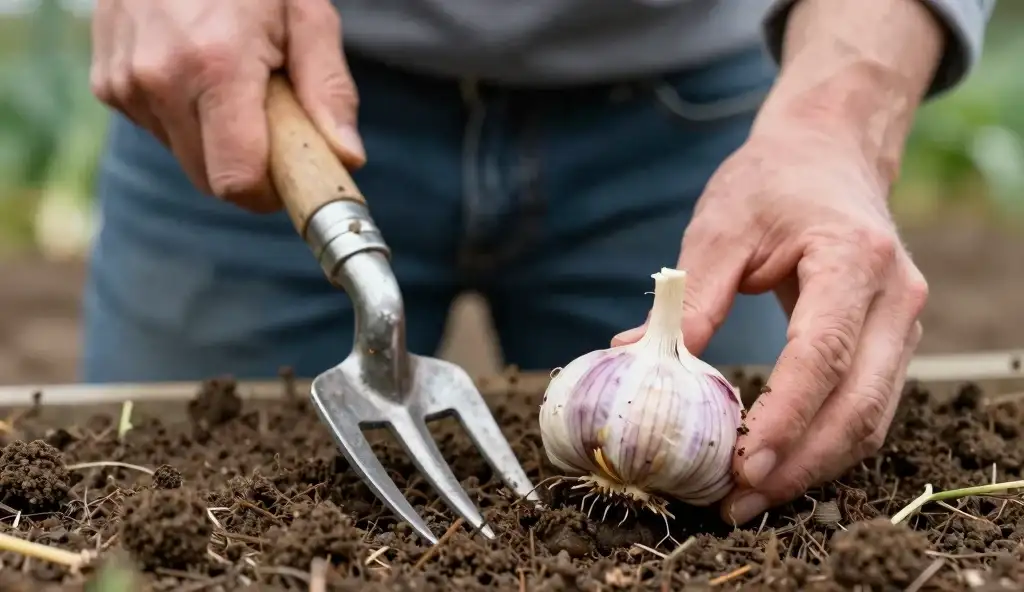
To harvest, never pull the plant by the stem, as it will likely snap off. Instead, use a sturdy garden fork to gently loosen the soil well beneath the bulbs, then lift them out carefully by hand. Brush off any loose dirt, but do not wash them.
Curing and Storing Garlic
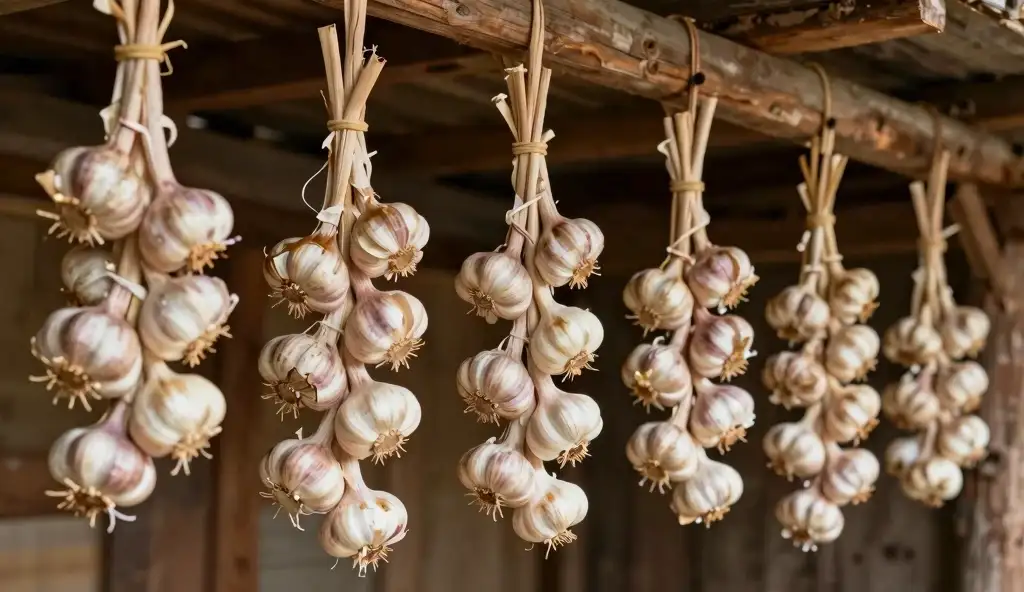
Freshly dug garlic must be cured before storage. Hang the whole plants in bunches, or lay them flat on wire racks in a dry, dark, and highly ventilated area—like an airy shed or covered porch. Leave them to cure for three to four weeks. During this time, the remaining energy in the leaves draws down into the bulb, and the outer skins dry into a tight, protective shell.
Once the necks are completely dry and the leaves are crispy, use bypass pruners to trim the roots back to 1cm, and cut the stem about 15cm above the bulb. Store your cured garlic in a cool, dark, dry pantry in a mesh bag or wire basket. Softneck varieties can be beautifully braided and hung in the kitchen.
Expected Yield: How Much Will You Get?
Garlic offers a phenomenal return on investment. The math is simple: one planted clove yields one entire bulb. A standard bulb of seed garlic contains roughly 8 to 12 plantable outer cloves. Therefore, if you buy a dozen heads of high-quality seed garlic, you can expect to harvest over 100 to 140 individual bulbs. This is easily enough to supply a family with fresh garlic for an entire year.
5 Common Beginner Mistakes to Avoid
Using Supermarket Garlic: Treating your garden to imported, chemically treated garlic will only lead to disappointment and potential soil diseases.
Planting Upside Down: If you plant the pointy end facing down, the garlic will expend massive amounts of energy executing a U-turn under the soil, resulting in curved, malformed bulbs.
Shallow Planting: Failing to bury cloves at least 5cm deep will result in the growing roots pushing the plant entirely out of the garden bed.
Forgetting to Weed: Garlic cannot outcompete vigorous spring weeds. Neglecting the weeding will stunt your crop severely.
Overwatering Before Harvest: Continuing to water heavily in December prevents the skins from drying, leading to bulbs that rot in storage.
Garlic Planting & Seasonal Care Chart
Season
Key Task
Actionable Details
Autumn (April – May)
Preparation & Early Planting
Dig in compost and sheep pellets. Plant cloves early in warmer regions (Northland, Auckland) to avoid late-season rust.
Winter (June – August)
Main Planting & Weed Control
Plant on the shortest day for temperate and cool zones. Apply thick pea straw mulch. Hand-pull weeds regularly. Keep watering to a minimum.
Spring (Sept – Nov)
Feeding & Watering
Apply liquid nitrogen fertiliser every 2-3 weeks. Water consistently. Remove scapes from hardneck varieties as soon as they curl.
Summer (Dec – Jan)
Drying Out & Harvesting
Stop watering 3-4 weeks before harvest. Lift bulbs when lower leaves brown. Cure in a dry, airy shed for a month before trimming.
Frequently Asked Questions About Growing Garlic
Can I plant garlic directly from the supermarket?
No, it is highly discouraged. Supermarket garlic is often imported, treated with sprout inhibitors to extend shelf life, and may carry soil-borne fungal diseases like white rot that can contaminate your garden for decades. Always use certified seed garlic.
Why is my garlic falling over and pulling out of the ground?
This is a classic sign of shallow planting. Garlic produces strong, aggressive roots. If the clove is not buried deep enough (at least 5cm), these roots act like hydraulic jacks, pushing the clove upward and heaving the plant out of the soil.
Do I need to peel the garlic cloves before planting?
Absolutely not. You should leave the papery outer skin intact on each individual clove. This skin acts as a protective barrier against soil pests, excess moisture, and fungal pathogens during the vulnerable early rooting phase.
What happens if I plant the garlic clove upside down?
If you plant the clove with the pointy end facing down, the shoot will be forced to grow downward before curving back up toward the sunlight. This wastes tremendous plant energy, resulting in a crooked stem and a significantly smaller, misshapen final bulb.
How often should I water my garlic plants?
During the cool winter months, rainfall is usually enough. In spring, as rapid leaf growth begins, water deeply once a week to keep the soil consistently moist. Crucially, you must stop watering entirely three to four weeks before your summer harvest to let the bulbs dry.
Why are my garlic leaves turning yellow?
If it is late November or December, yellowing lower leaves are a normal sign that the plant is maturing and nearing harvest time. However, if leaves turn yellow in early spring, it usually indicates poor soil drainage (waterlogging) or a lack of nitrogen, requiring an immediate liquid feed.
Conclusion: Ready to Grow Your Own?
Learning how to grow garlic is a rite of passage for every New Zealand gardener. It bridges the gap between the sleepy winter garden and the bustling summer harvest. By investing a little time into soil preparation, sourcing quality seed, and following a smart feeding and watering schedule, you will bypass the common pitfalls of rust and rot. There is nothing quite like slicing into a crisp, highly aromatic clove of garlic that you nurtured from the soil up. Get your garden beds prepped, source your cloves, and get ready for your most flavorful harvest yet!


[…] our full how to grow garlic […]