We use cookies to improve your experience, analyze traffic, and display personalized ads.
By clicking "Accept", you consent to the use of cookies in accordance with our Privacy Policy.
How to Grow Feijoa in New Zealand: The Complete Kiwi Grower’s Guide
Few fruits are more quintessentially Kiwi than the feijoa. Walk down any suburban street in autumn and you’ll catch that unmistakable fragrance drifting over the fence — sweet, tropical, and entirely irresistible. Learning how to grow feijoa in New Zealand is one of the most rewarding projects a home gardener can take on. Whether you want a single specimen tree, a productive hedge, or a container plant on the patio, feijoas deliver year-round interest with minimal fuss. This guide covers everything from soil preparation and variety selection to harvesting, pruning, and troubleshooting common problems.
Feijoa (Acca sellowiana), also known as pineapple guava, is a subtropical evergreen shrub or small tree native to the highlands of South America — southern Brazil, Uruguay, Argentina, and Paraguay. It was introduced to New Zealand in the early 20th century and has since become a backyard staple. Left unchecked, feijoas grow up to 5 metres tall and 3 metres wide, but they respond beautifully to pruning and can be shaped into compact trees, formal hedges, or espaliers.
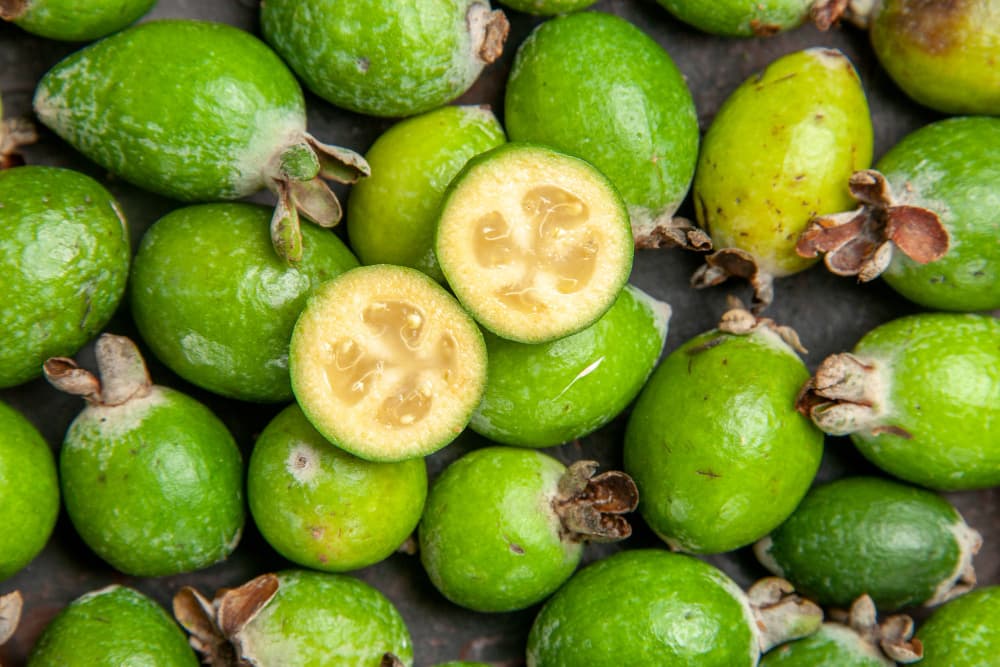
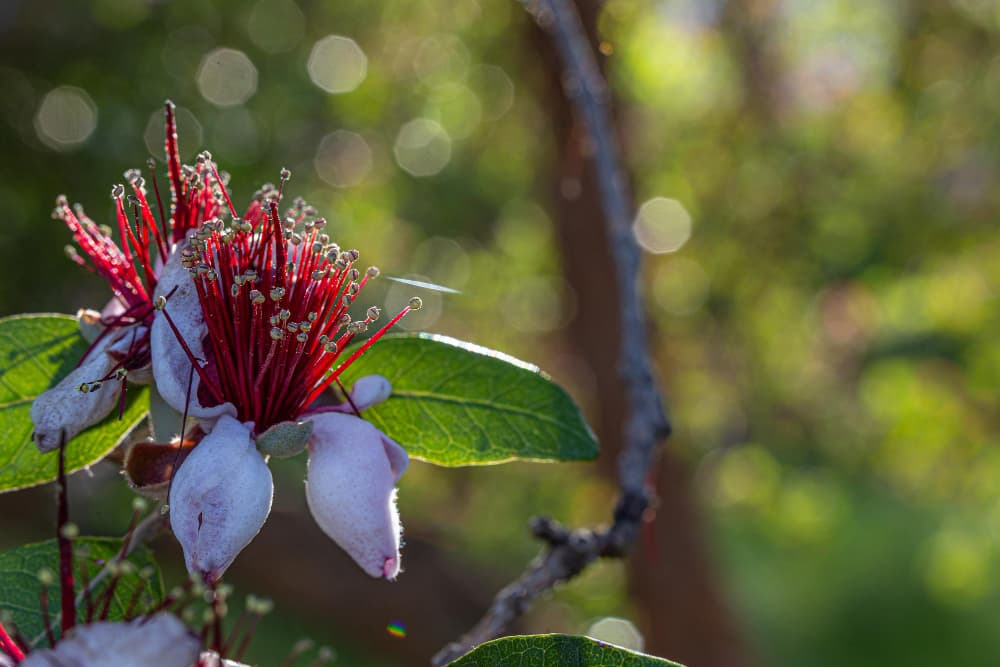
The fruit is oval and green-skinned with soft, creamy-yellow flesh that tastes like a cross between pear, passionfruit, and pineapple with a slightly gritty texture. The flowers are just as remarkable — striking pink and white blooms in spring and early summer that are entirely edible, with a mild marshmallow and strawberry flavour. Birds love the petals and, in eating them, help pollinate the flowers — a charming example of nature working in your favour.
Feijoa Growing Conditions at a Glance
Factor
Ideal Requirement
Tolerance Range
Sunlight
Full sun (6+ hours daily)
Partial shade tolerated
Soil pH
6.0–6.5 (slightly acidic)
Down to 5.5; avoid alkaline soils
Soil type
Free-draining, fertile loam
Tolerates clay and sandy soil; no waterlogging
Frost tolerance
Hardy once established
Survives to -10°C; protect young plants
Wind
Sheltered position
Tolerates coastal salt spray
Spacing (tree)
3–4 m between plants
1–2 m for hedge planting
Mature height
2–5 m (unpruned)
Can be maintained shorter with regular pruning
Time to first fruit (grafted)
2–3 years
Up to 7 years from seed
Choosing the Right Feijoa Variety
With so many varieties available at New Zealand garden centres, picking the right feijoa makes a huge difference to your harvest. Varieties differ in fruit size, flavour profile, and — crucially — harvest timing. By planting two or more varieties with overlapping flowering periods, you encourage cross-pollination and significantly boost your yield. Most feijoas are described as self-fertile, but every variety produces more fruit with a pollination partner nearby.
Popular New Zealand Feijoa Varieties
Variety
Harvest Season
Fruit Size
Best Use
Unique
February–March (early)
Medium
Eating fresh, small gardens
Pounamu
March–April
Medium–large
General garden use
Den’s Choice
April
Large
Heavy cropping, flavour
Apollo
April–May
Large
Hedging, large gardens
Triumph
April–June
Medium
Extended season, hedging
Mammoth
May–June (late)
Very large
Showpiece fruit, gifting
Wiki Tu
May–June (late)
Medium
Late-season eating
Bambina
April–May
Small
Pots, compact gardens
Kakapo
April–May
Small–medium
Compact growing, containers
Marion
April–June
Medium–large
Hedging, flavour
Pro tip: Plant an early variety (like Unique) alongside a mid-season variety (like Apollo or Den’s Choice) to extend your harvest window from late summer through to early winter. (See our full feijoa variety comparison guide)
When to Plant Feijoa in New Zealand
Autumn and spring are the best times to plant feijoas across most of New Zealand. Planting in autumn — from around March to May — gives roots time to establish while the soil is still warm, setting the plant up for strong spring growth. Spring planting (August to October) works well too, just be prepared to water more consistently through the first summer. Feijoas can technically be planted year-round, but avoid planting in the peak of summer unless you can water daily, and delay autumn planting until spring if you live in a frost-prone area like Central Otago or inland Canterbury.
Planting Calendar by NZ Climate Zone
Region
Best Planting Window
Notes
Northland / Auckland
March–May, Aug–Oct
Year-round possible with irrigation
Waikato / Bay of Plenty
March–May, Aug–Oct
Ideal feijoa country
Hawke’s Bay / Gisborne
March–April, Sept–Oct
Excellent growing region; water in summer
Wellington / Manawatū
Sept–Nov preferred
Shelter from wind is critical
Nelson / Marlborough
Sept–Oct, March–April
Excellent flavour development in dry summers
Canterbury / Otago
Sept–Nov only
Wait for frost risk to pass; mulch heavily
How to Prepare the Soil
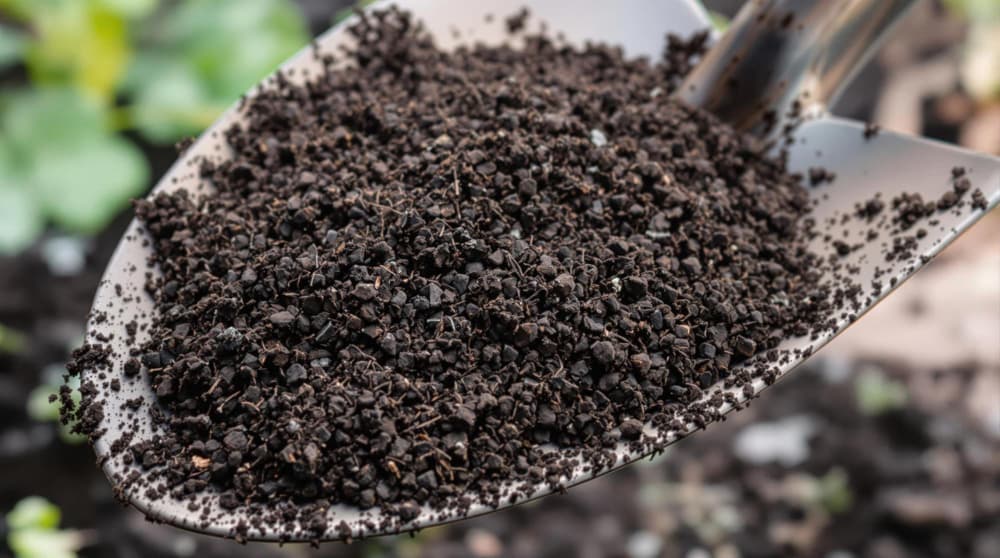
Feijoas are forgiving of a wide range of soil types — they’ll grow in everything from heavy clay to sandy loam — but they perform best in free-draining, fertile soil with a pH between 6.0 and 6.5. Waterlogged soil is the one condition feijoas genuinely cannot tolerate, as it leads to root rot and poor fruit set. If your soil is compacted clay, plant on a raised mound or raised bed to improve drainage.
Before planting, work a generous amount of organic matter into the soil. Compost, sheep pellets, and a quality garden mix all improve soil structure, water retention, and microbial activity. Avoid applying nitrogen-heavy fertilisers at planting time — you want to encourage strong root development first, not a flush of soft leafy growth that can be vulnerable to wind damage.
How to Plant Feijoa: Step-by-Step
Choose your location. Select a full-sun or lightly shaded spot with at least 6 hours of direct sunlight daily. Shelter from strong prevailing winds is important, especially in coastal or exposed sites.
Prepare the soil. Dig in compost and sheep pellets across a wide planting area. If soil pH is above 6.5, apply a soil acidifier to bring it into range.
Dig the hole. Make the hole approximately twice the width and twice the depth of the root ball. This loosened soil makes it easy for young roots to spread.
Amend the backfill. Mix your existing soil 50/50 with a quality citrus and fruit planting mix or compost. Add a handful of blood and bone or a slow-release citrus fertiliser to the hole.
Position the plant. Gently loosen the root ball and tease out any circled or bound roots. Place the plant in the hole so the top of the root ball sits level with the surrounding soil — never bury the crown.
Backfill and firm. Fill in with your amended soil mix, firming gently around the roots to remove air pockets. Do not compact the soil aggressively.
Water in thoroughly. Give the newly planted feijoa a deep, thorough watering to settle the soil around the roots.
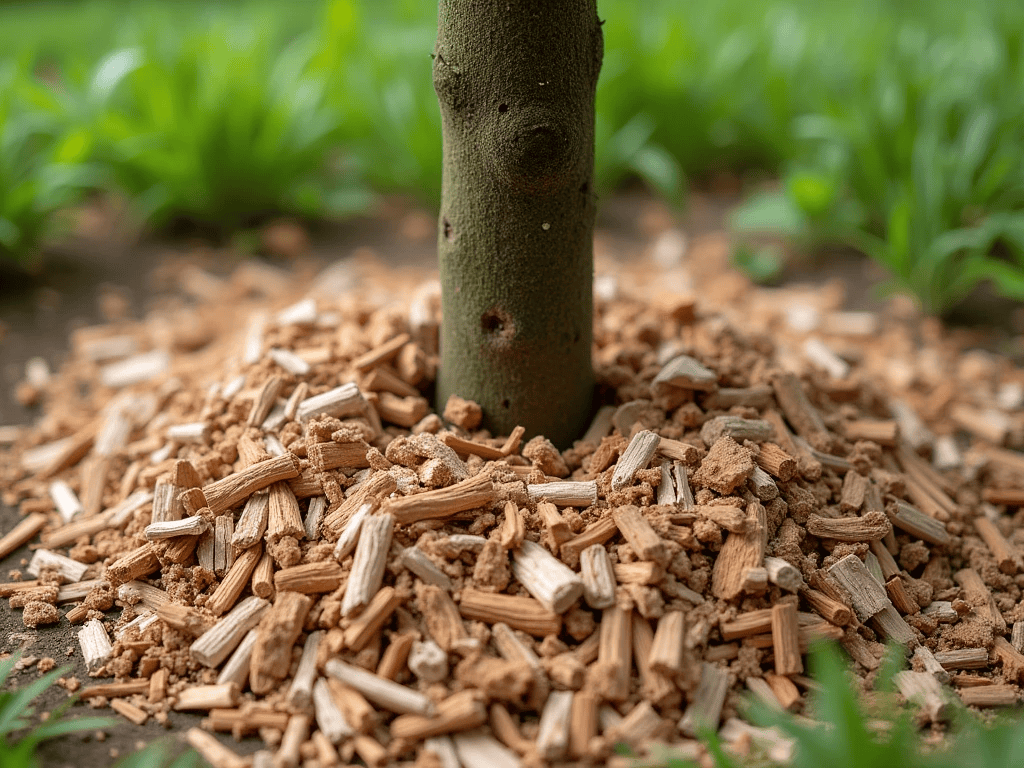
Mulch. Apply a 5–8 cm layer of bark chips, pea straw, or compost around the base of the plant, keeping mulch away from direct contact with the trunk. This retains moisture, moderates soil temperature, and protects the shallow root system.
Stake if needed. In windy areas, stake the young tree loosely to provide stability while the root system anchors itself — usually for the first 12 months.
Watering Your Feijoa
Newly planted feijoas need consistent moisture for the first 12–18 months while they establish. Water every 2–3 days during dry spells, aiming for a deep soak rather than a light sprinkle. Once established, feijoas are surprisingly drought tolerant — but don’t let that fool you during the critical fruit development phase.
From mid to late summer (January through March), when fruit is swelling and ripening, water deeply once or twice a week. Inconsistent moisture during this period can lead to fruit split, premature drop, or undersized fruit. A well-maintained drip irrigation system on a timer makes this stage much more manageable and ensures even moisture delivery without wetting the foliage.
Fertilising Feijoas
Feijoas are moderate feeders that reward a consistent fertilising programme. The goal is to fuel healthy foliage growth and flower production through spring and summer, then support fruit development and ripening through autumn. Avoid over-feeding with nitrogen, which encourages leafy growth at the expense of fruit.
Recommended Fertiliser Schedule
Time of Year
Fertiliser Type
Purpose
Early spring (August–September)
Balanced NPK or citrus & fruit granular
Stimulate new growth and bud formation
Late spring (November)
Citrus & fruit granular (potassium-rich)
Support flowering and fruit set
Mid-summer (January)
Citrus & fruit granular
Fuel fruit development and sizing
Early autumn (March)
Low-nitrogen NPK or potassium booster
Support fruit ripening and tree recovery
Post-harvest (May–June)
Compost top-dress or sheep pellets
Replenish organic matter; rest phase support
Potassium is especially important for fruit quality and flavour in feijoas. A citrus and fruit-specific granular fertiliser that is high in potassium (K) is your best all-round choice from spring through to harvest. Always water fertiliser in well after application.
Pollination: Do Feijoas Need a Partner?
Most commercially sold feijoa varieties are described as self-fertile, meaning a single plant can set fruit. However, cross-pollination between two different varieties that flower simultaneously will almost always produce a heavier, more reliable crop. Birds — particularly silvereyes, tūī, and waxeyes — are the primary pollinators of feijoas in New Zealand. They are attracted to the brightly coloured fleshy petals, which they eat, inadvertently transferring pollen in the process. Bees and other insects also assist.
To maximise pollination success, plant at least two different feijoa varieties within close proximity (ideally within 10 metres). Check that the varieties you choose overlap in their flowering period — late-season varieties can have poor fruit set if planted next to an early-flowering variety that has already finished blooming. Encourage pollinators into your garden by planting flowering companion plants and avoiding pesticide use during flowering.
Pruning Feijoas
Feijoas are easy to prune and respond well to both light shaping and heavy reduction. The key rule is simple: always prune after harvest, during late autumn or winter (May to August). Pruning at this time allows the tree to recover and put energy into spring growth, flower bud development, and a strong fruiting season ahead.
Pruning by Purpose
Young plants: Pinch out growing tips during the first 1–2 years to encourage branching and a bushy, productive structure rather than a single tall leader
Established trees: Remove dead, damaged, or crossing branches; thin the canopy to let in light and air, which improves fruit ripening and reduces disease risk
Hedges: Feijoas can be clipped to shape after harvest; note that aggressive shearing will reduce flowering and fruiting, so maintain the hedge with lighter cuts where possible
Renovation pruning: Overgrown, neglected feijoas can handle hard pruning — cut back by up to one-third and the plant will regenerate strongly
Container plants: Prune assertively each year after harvest to maintain a manageable size and stimulate fruiting wood
Never prune feijoas in spring or early summer — you risk removing flower buds and cutting your harvest short before it even begins.
Growing Feijoa in Pots and Containers
Feijoas grow surprisingly well in containers, making them ideal for courtyards, balconies, and smaller urban sections. Choose compact varieties like Bambina, Kakapo, or Opal Star for the best results. Select a pot at least 500 mm in diameter with excellent drainage holes, and fill with a quality potting mix designed for citrus and fruiting plants — one that contains water retention crystals is ideal, as containers dry out faster than garden beds.
Container feijoas need more frequent watering and feeding than their in-ground counterparts. Water when the top 2–3 cm of potting mix feels dry, and feed with a liquid citrus fertiliser every 4–6 weeks from spring through to harvest. Repot every 2–3 years into a slightly larger container, refreshing the potting mix as you go. Prune annually after harvest to keep the plant compact and productive.
Harvesting Feijoas
Knowing when feijoas are ready is one of the most satisfying skills a feijoa grower develops. Unlike many fruits, feijoas do not ripen on the tree in the traditional sense — the best signal that harvest time has arrived is when fruit begins to fall naturally to the ground. Resist the urge to pick fruit early; feijoas picked too soon will be hard and flavourless.
Harvesting Tips
Wait for the first windfall fruit to appear on the ground beneath the tree — this signals the harvest window has opened
Gently cup fruit in your hand and apply slight upward pressure; ripe fruit will separate easily from the stem
Alternatively, give the tree a gentle shake — ripe fruit will fall freely
Fruit should feel slightly soft and give gently under thumb pressure when ripe
Harvest season runs from February (very early varieties) through to June or July (late varieties), depending on the cultivar and your location
Feijoas will continue to ripen slightly after picking — store at room temperature for up to a week, or refrigerate for 2–3 weeks
Fallen fruit should be collected daily to prevent fermentation and pest attraction
Expected Yield
A healthy, established feijoa tree in a well-managed New Zealand garden can be impressively productive. Grafted plants typically begin producing fruit within 2–3 years of planting, while seed-grown plants may take up to 7 years. A mature feijoa tree (5–10 years old) in good conditions can produce 20–50 kg of fruit per season, with some vigorous specimens producing even more. Yield will be significantly higher if a cross-pollination partner is planted nearby and the tree is fed consistently throughout the growing season.
A well-cared for feijoa tree can remain productive for in excess of 30 years — making it one of the best long-term investments you can make in an edible garden.
Common Pests and Diseases
Feijoas are generally robust and relatively pest-free compared to many fruiting plants. However, a few problems are worth watching for, particularly as your trees mature and their canopy fills out.
Feijoa Pest & Disease Troubleshooting
Problem
Symptoms
Solution
Scale insects
Brown or white lumps on stems and leaves; sooty mould; ants on trunk
Spray with horticultural oil; control ants separately
Mites
Fine stippling on leaves; bronzing; webbing on undersides
Spray with miticide; ensure good coverage of leaf undersides
Leaf roller caterpillars
Rolled leaves bound with webbing; ragged leaf edges
Spray with an organic or registered caterpillar control
Guava moth
Holes in fruit; internal larvae damage; premature fruit drop
Use pheromone traps; bag fruit in paper bags; clean up fallen fruit immediately
Birds
Pecked or removed fruit; damage to petals
Protect with bird netting or wire mesh during ripening
Improve drainage; plant on a mound; reduce watering frequency
Poor fruit set
Flowers but no fruit; light crop
Add a second variety for cross-pollination; increase potassium feeding
Guava moth is an increasingly significant pest across the North Island and upper South Island. The larvae tunnel into developing fruit, causing it to fall prematurely. Good orchard hygiene — collecting and disposing of fallen fruit immediately rather than leaving it to rot — is the single most effective control measure available to home gardeners.
Beginner Mistakes to Avoid
Most feijoa problems in home gardens come down to a handful of avoidable errors. Getting these right from the start will save years of frustration and ensure your trees reach their potential much sooner.
Planting only one variety: Even self-fertile varieties produce significantly more fruit when cross-pollinated — always plant at least two
Picking fruit too early: Green feijoas that haven’t yet fallen are invariably unripe; wait for windfall fruit before harvesting the tree
Over-watering young plants: Wet feet and poor drainage kill feijoas faster than almost anything else; always check drainage before planting
Pruning at the wrong time: Pruning in spring removes flower buds — prune only after harvest, in late autumn or winter
Skipping fertiliser: Feijoas planted in average garden soil without ongoing feeding will produce disappointing yields; a regular potassium-rich fertiliser makes a visible difference
Choosing the wrong variety for a small space: Apollo and Triumph can grow very large unpruned; choose compact varieties like Bambina or Kakapo for small gardens and pots
Neglecting mulch: Feijoas are shallow-rooted and suffer in dry summers without a good mulch layer to protect the root zone
Expecting fruit in year one: Grafted plants need 2–3 years to fruit; be patient and focus on building a strong root system in the early years
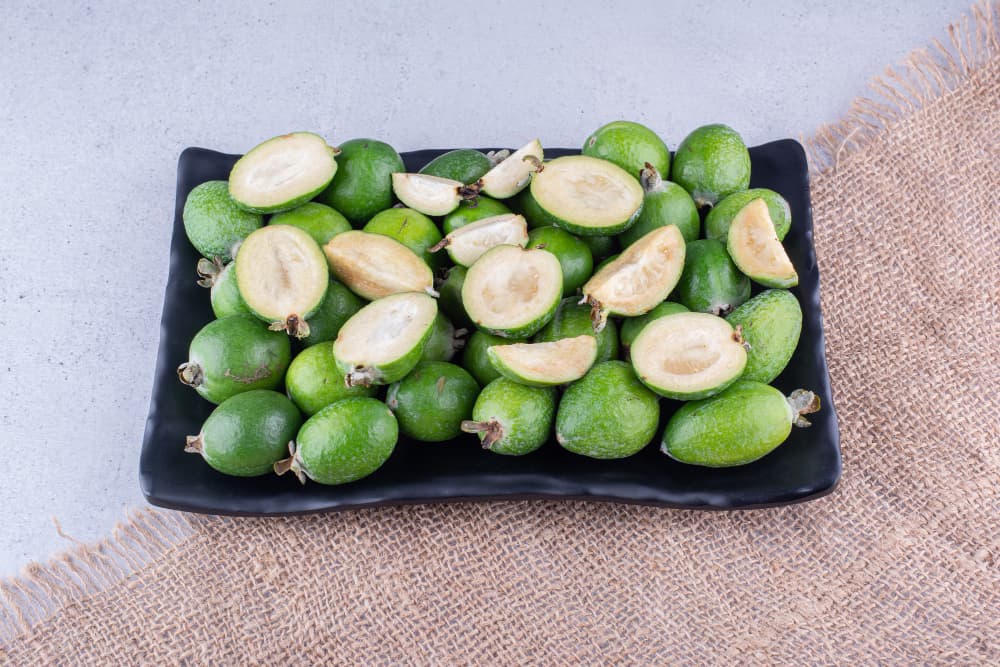
Using Your Feijoa Harvest
The simplest and arguably best way to eat a feijoa is the classic Kiwi method — cut in half and scoop out the flesh with a teaspoon. Beyond eating fresh, feijoas are spectacularly versatile in the kitchen. The small seeds inside are entirely edible. Popular uses include feijoa cake, muffins, crumble, jam and chutney, smoothies, cocktails and mocktails, fruit salads, and feijoa wine or cider. Because the season is short and intense, many NZ gardeners freeze feijoa pulp in bags to use throughout the year.
Don’t forget the flowers. Feijoa petals are edible and have a mild, sweet flavour reminiscent of marshmallow and strawberry. They make a beautiful addition to cocktails, fruit salads, and dessert platters — a delicious bonus from a tree that’s already giving you so much.
Feijoas as Hedges and Windbreaks
One of the most popular uses for feijoas in New Zealand gardens is as an edible hedge or windbreak. Varieties like Apollo, Triumph, and Marion make dense, attractive hedges that provide privacy, shelter, and fruit simultaneously. Plant hedge feijoas 1–2 metres apart, depending on how quickly you want canopy closure, and prune to shape after each harvest season.
Be aware that aggressive hedge clipping in the traditional sense — shearing to a flat face in spring or summer — will significantly reduce flowering and fruiting. The best approach is to prune hedge feijoas with loppers or hedge trimmers immediately after harvest (May–July), removing the previous season’s growth to keep the hedge tidy while preserving flowering wood for the following year.
Frequently Asked Questions
How long does it take for a feijoa to fruit in New Zealand?
Grafted feijoa trees typically begin producing fruit within 2–3 years of planting. Trees grown from seed take considerably longer — sometimes up to 7 years before the first fruit appears. For home gardeners wanting results sooner rather than later, always buy a grafted named variety from a reputable NZ nursery rather than growing from seed.
Do feijoas need a lot of water?
Once established (after 12–18 months), feijoas are drought tolerant and won’t need watering during normal rainfall periods. However, consistent deep watering from mid-summer through to harvest (January–April) is important for fruit sizing and quality. In prolonged dry spells, water deeply once or twice a week. Container-grown feijoas need more regular watering than in-ground plants throughout the entire growing season.
Why is my feijoa not producing fruit?
The most common reasons for poor fruit set are insufficient sunlight, lack of a cross-pollination partner, inadequate potassium in the soil, or simply that the tree is too young. Check that your feijoa gets at least 6 hours of direct sun daily, feed it with a potassium-rich citrus fertiliser from spring through summer, and if you only have one tree, plant a second variety nearby to improve pollination. Also, confirm your tree is grafted — seed-grown plants can take up to 7 years to fruit.
When is feijoa season in New Zealand?
Feijoa season in New Zealand runs from approximately February through to June or July, depending on the variety and your location. Early varieties like Unique start producing as early as February or March. Mid-season varieties such as Apollo and Den’s Choice peak in April and May. Late varieties including Mammoth and Wiki Tu extend the season through June. By planting multiple varieties, you can enjoy fresh feijoas for four to five months of the year.
Can I grow feijoa in a pot?
Yes — feijoas grow well in containers when given the right conditions. Choose a compact variety like Bambina, Kakapo, or Opal Star, and use a pot at least 500 mm in diameter filled with a quality citrus and fruit potting mix. Container feijoas need more frequent watering and fertilising than in-ground trees, and should be pruned annually after harvest to maintain size and encourage fruiting. Repot every 2–3 years to refresh the potting mix.
How frost-hardy are feijoas?
Established feijoa trees are among the more frost-tolerant subtropical fruiting plants, tolerating temperatures as low as -10°C once well-established. However, newly planted or young feijoas (under 2 years old) are significantly more vulnerable to frost damage, particularly in the first winter. In frost-prone regions like Central Otago or inland Canterbury, delay planting until spring and protect young plants with frost cloth during their first winter or two.
Do feijoas have any pest problems in New Zealand?
Feijoas are generally resilient, but there are a few pests to watch for. Guava moth has become a significant issue across the North Island and upper South Island, with larvae tunnelling into fruit and causing premature drop. Scale insects, mites, and leaf-roller caterpillars can also affect foliage. Good orchard hygiene — removing fallen fruit promptly — is the most effective control for guava moth. Birds can damage ripe fruit; netting provides the best protection during harvest season.
What’s the best fertiliser for feijoas in New Zealand?
A potassium-rich citrus and fruit granular fertiliser is the best all-round choice for feijoas from spring through to harvest. Potassium supports flowering, fruit set, and flavour development. Apply in early spring, late spring, and midsummer. After harvest, switch to a compost top-dress or sheep pellets to replenish organic matter. Avoid over-applying nitrogen, which promotes leafy growth at the expense of fruiting. Always water fertiliser in well after application.
Conclusion: Grow Feijoas and Enjoy the Rewards for Decades
Growing feijoa in New Zealand is one of the most straightforward and rewarding decisions you can make as a home gardener. With a little attention to soil preparation, planting position, and a consistent fertilising programme, these tough, beautiful trees will reward you with kilograms of fragrant, flavour-packed fruit season after season. From edible flowers in spring to a bumper autumn harvest, feijoas deliver something wonderful in every season. Plant two varieties this autumn, feed them well, and in a few short years you’ll be the neighbour with the fruit everyone else wishes they were growing.


Leave a Reply